The Fabrication Chronicles | 1:1 Component Week 10-11 Process Blog
- Daniel Ho
- Oct 23, 2019
- 6 min read
While my group continued to develop the library, I started considering what component we should build as a 1:1 component. At first my group wasn't inclined to construct a stool/chair; however, I felt this object is irrelevant to our design’s themes. Instead, I proposed we construct a tablet shelf; the same tablet shelf present in our design since week 3. However, my group was conflicted to move forward with this component. Upon further interrogation, I found out this is due to my group's anxiety on the making process; most of us lacking knowledge in fabrication. Thus, I paid a visit to the architecture steel workshop; pitching several questions regarding how we would craft the shelf:
When considering a material for the shelf I was leaning towards steel; allowing a patina finish to build up over time. However, my group preferred the polished steel aesthetic.
To connect steel joints seamlessly, Sharon proposed we use tig welding and then grind it down to create a smooth finish.
To bend the steel, we would need a specialized steel Bender to create clean folds.
These answers alleviated some of the concerns that my group had however they were still not satisfied with the tablet shelf design. Thus, I underwent another iterative process to create a more convincing tablet shelf design, most keeping in mind the construction methods that I would use to create the component.


Tablet Shelf Process - Considering the critics feedback during mid semester crit, I wanted to find a middle point between the front facing and shelved-in tablet design.
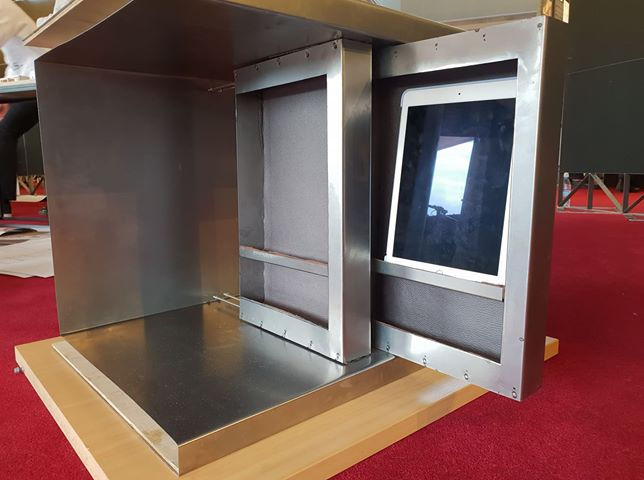
In the end, I proposed a tablet casing with a similar form factor to the traditional book. the user would pull out the casing unit; revealing the tablet inside. To communicate the design to my group I created a orthographic drawing to convey the scale, and appearance of the shelf.

Because of the updated design, I consulted with Sharon again about creating a rail unit for the casing to slide on. After a couple of iterations, we decided to use a steel rod running along a double C-section welded together.
With some faith, the group green-lighted the tablet shelf design leading us to start fabricating the component. With fellow group member, Noah, we went to the Elam workshop to start the fabrication process. There we were introduced to the Elam’s head metal technician, Robin. Throughout the process she would help consolidate our construction methods and supply the steel to craft the shelf.
Day 1
We first decided to create a test bend of our shelf unit. Using the steel bender, we managed to get the steel sheet to shape. However, we found out through this process our shelf unit is structurally unstable. Because of this, Robin recommended we cut rib structures from MDF to reinforce the structure. During this process, we also observed that my initial measurements felt too deep for a shelf unit (500mm); feeling more like a locker than a shelf. thus by the end of the day I needed to revise the measurements of the shelf.
After some revision, I concluded the shelf depth can be reduced to 400mm, while the tablet casing can be reduced to 250mm in width.

Day 2
Continuing from yesterday, I decided to salvage some 18mm MDF boards from the architecture workshop. The shelf’s form required the MDF to be cut into C shaped units; of which Elam’s Wood technician, Joe, would help us with. We first needed to cut them into the exact same height and depth, then we used to a band saw to cut out the inner section of the ribs.

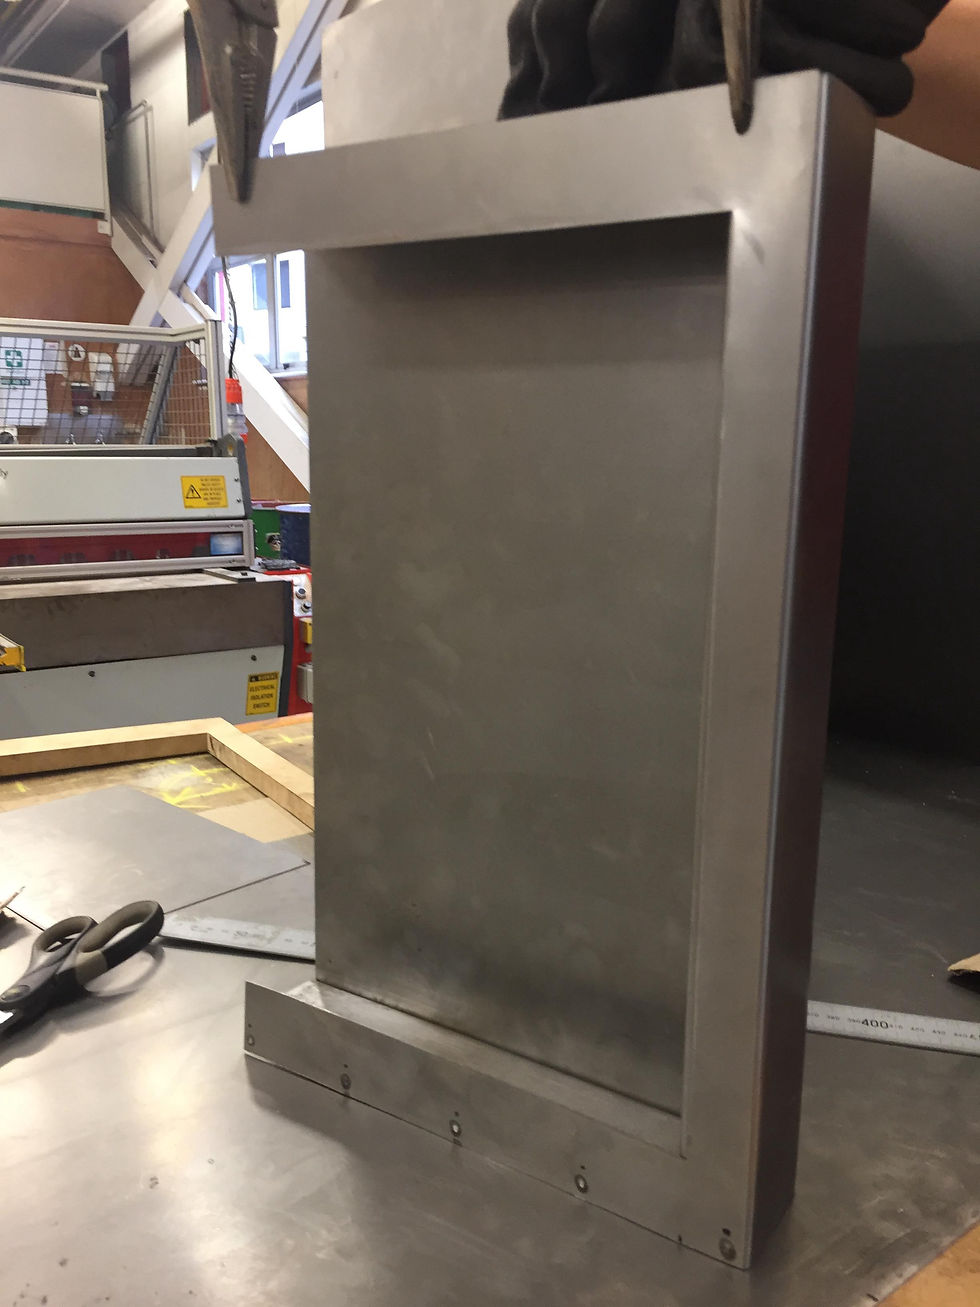
Afterwards we we're ready to proceed with bending the actual shelf unit. using a 2440mm by 600mm sheet, Robin Noah and I successfully bent the steel into shape; forming the surface of our tablet shelf. We then tested in our rooms fitted into the folds, but we discovered we cut the ‘inner C’ of some ribs too small; requiring us to adjust some of the ribs.
Furthermore, I consulted with Robin on how we will connect the MDF to the steel. she provided a couple of options to work with:
- Firstly, we could screw it in. While a very efficient fix, we didn't want to fit the clean surface of the steel, thus this solution was dismissed.
- Secondly, we use epoxy glue to stick the ribs onto the steel, however this required me to go to Bunnings to supply our own adhesive.
We would end up choosing the latter because it preserves the clean aesthetic of our shelf.

Day 3
Due to time constraints, Noah and I began fabricating the tablet casing:
- Firstly, we cut a 550 by 400 millimeter steel sheet to form the outer casing.
- We then cut another C-section into one side of the casing; creating a gap where the tablet can be removed and replaced. This was cut in a similar way to our ribs on a metal bandsaw.
- We then bent the casing into the shape of a Buck approximately 50mm thick, send 250mm wide on each side.
- To avoid potential cuts on the spine, we decided to cut another C-section to fit into the casing via friction joint. This turned out particularly successful as it also reinforced the structure of the casing.
- We then created two more C sections for the top and bottom of the casing; spot welding them on at 60mm intervals to transform the joint into an aesthetic. PC sections leave a 15mm gap for the rail units to slot into later.
- To enclose the inner end of the casing, Noah proposed a C-bent strip of steel to wrap into the top and bottom C-Sections; creating a blockade at the end to stop the tablet from sliding out. initially this is unsuccessful in creating a seamless enclosure; wiring Noah to walk the strip along the edge to stop it from bending.

Day 4
- On this day I wanted to figure out how to create a lip for the tablet to sit on. Robin suggested I bring the lip down to the bottom C-section to maintain a seamless look.
- The lip was cut to ensure there was a 65mm gap between the bottom lip and the tablet lip itself. This was an ergonomic decision to ensure people can easily grab objects out from the lower compartment.
- To connect the tablet to the casing I spot welded the case at the back; spacing it at 60mm intervals to reflect the language of the existing spot welds.
- While undergoing this process, Noah embark to create the second tablet casing; managing to nearly finish it on the day.


Day 5
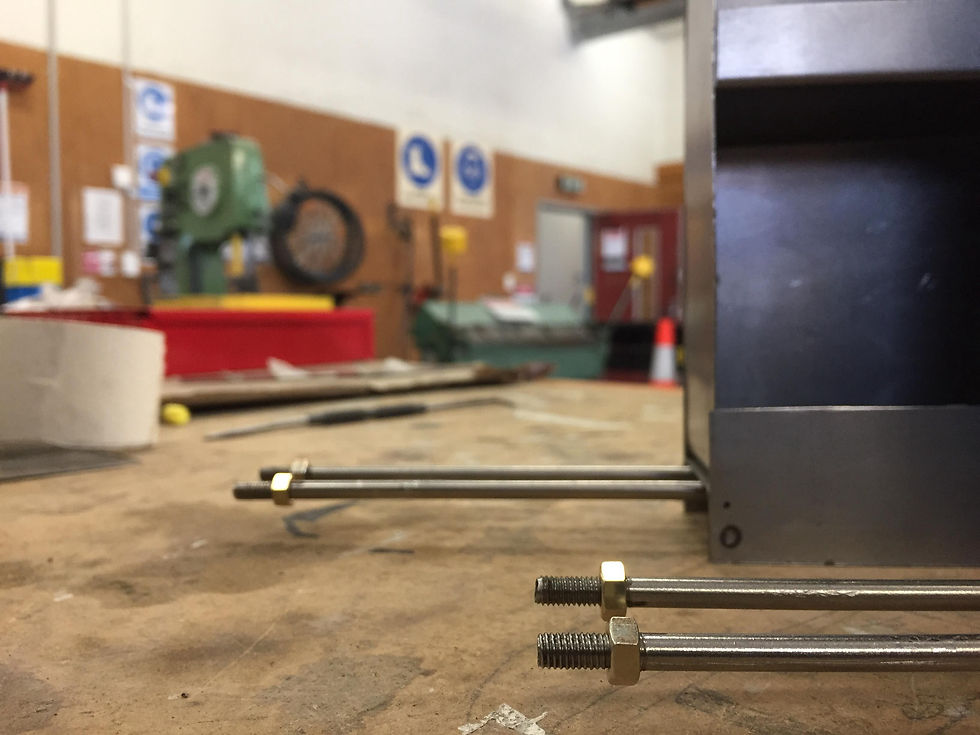
- We started off by cutting steel rods into 350mm sections at the architecture workshop, then no one needed to read the ends of the rods so an M5 nut can be screwed in as a stopper.
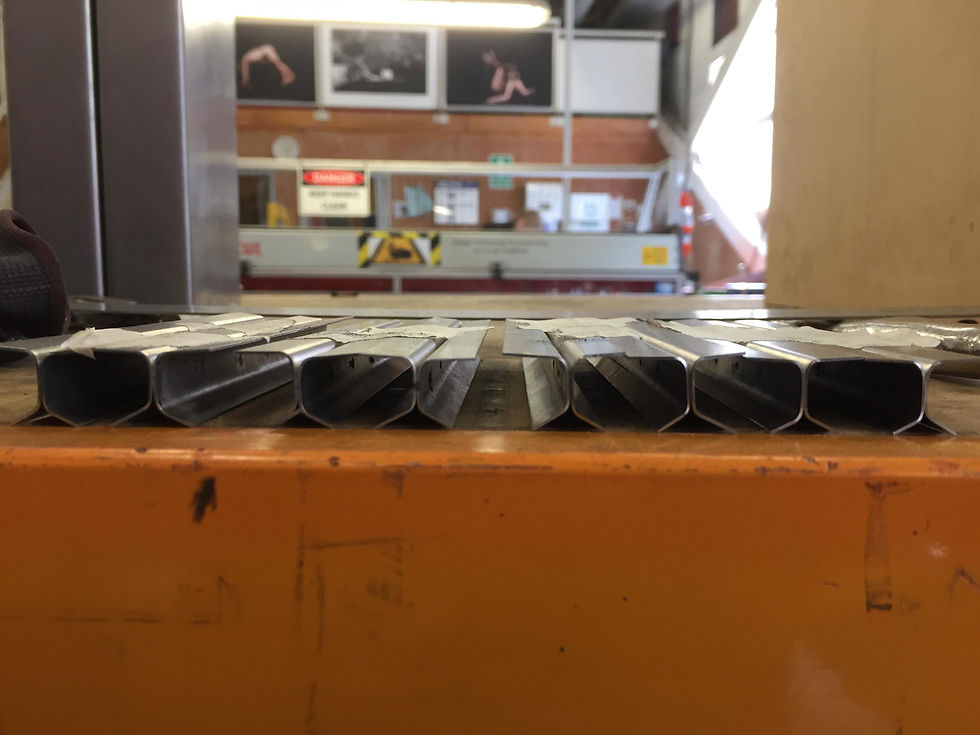
- We then started fabricating the rail units; comprising of two 150mm C-sections spot welded at 25mm intervals.
- After some trial and error, we managed to get an optimal height for the rail; Using a .5 millimeters steel rod as a guideline.
- Once we got the ideal measurements, we fabricated sixteen C-sections or 8 rail units. While successful on the table we would not want to upset sure until we attach the rails to the shelf.
- The rest of the day we focused on refining the rib units; requiring us to add an additional 5 mm MDF base on both the Top and bottom of the shelf to compensate for the original mistakes.
- Assured that our structure that's perfectly into the shelf, we started preparing the surface is for the epoxy; sanding and cleaning the surfaces.
Day 6
- On the final day we had access to the workshop we spot welded the steel rods onto the tablet casing.
- Using a nail gun, we connected the MDF bases to the ribs.
- Now that we have all our components, we decided to move everything over to the architecture workshop to assemble.
- We then marked down exactly where the rails should be ensuring that they are in parallel with each other.
- Once we are confident in our marks, we mixed some the epoxy glue (that stuff stinks) And clamp the rails on to their specified locations. These would be left to cure for approximately 2 hours.
- Because Noah had to leave, I called Ethan down later that night to help glue that MDF structure to the shelf. While we managed to glue the ribs on, we did not have enough glue for the MDF bases, thus we had to postpone this process until the following day.


Day 7
- With more epoxy glue in hand we finished gluing the MDF structure to the shelf; Allowing to set for 1 1/2 hours before handling.
- We then decide to test out the sliding mechanism of the casing; which worked as planned. While Ethan was concerned the casing could be wriggled out, these worries were annulled when the shelf stood upright.
Day 8
- My group was desperate to upholster the inside of the casing to prevent any scratching on the device. Just let me go to spotlight just select an appropriate upholstery material.
- From their wide selection, I mean towards the leather due to it being the softest material they had. Furthermore, I was skeptical of using velvet or cotton around devices due to potential fluff build-up.
- Returning to Architecture, I quickly sliced up the upholstery to shape, and stuck it on using spray adhesive. While successful, I do regret not buying a spray adhesive with longer work time.
- Using a cloth, I cleaned up any odd marks on the shelf; Officially finishing the Tablet Shelf!


Comments